Act on Many Leads at Once
When you need to move a whole segment of leads — email everyone who came in from an event, reassign a territory, tag a campaign group — doing it one record at a time wastes the day. Bulk actions let you act on many contacts in one step: send a shared email, hand them all to a new owner, tag a segment, delete a batch, or export them to a file. You select the contacts first, then click the action button.
Entry pointCRM → Contacts
| Requires | Permission for the matching action (email, assign, tag, delete, export). |
|---|
Select the Contacts
- Open CRM → Contacts.
- Use the filters or Advanced Search to narrow the list to the contacts you want to act on.
- Tick the checkbox at the start of each row, or tick the header checkbox to select every visible contact.
- The action toolbar (above the table, next to Showing page 1 of Contacts) lights up. Each icon is one bulk action.
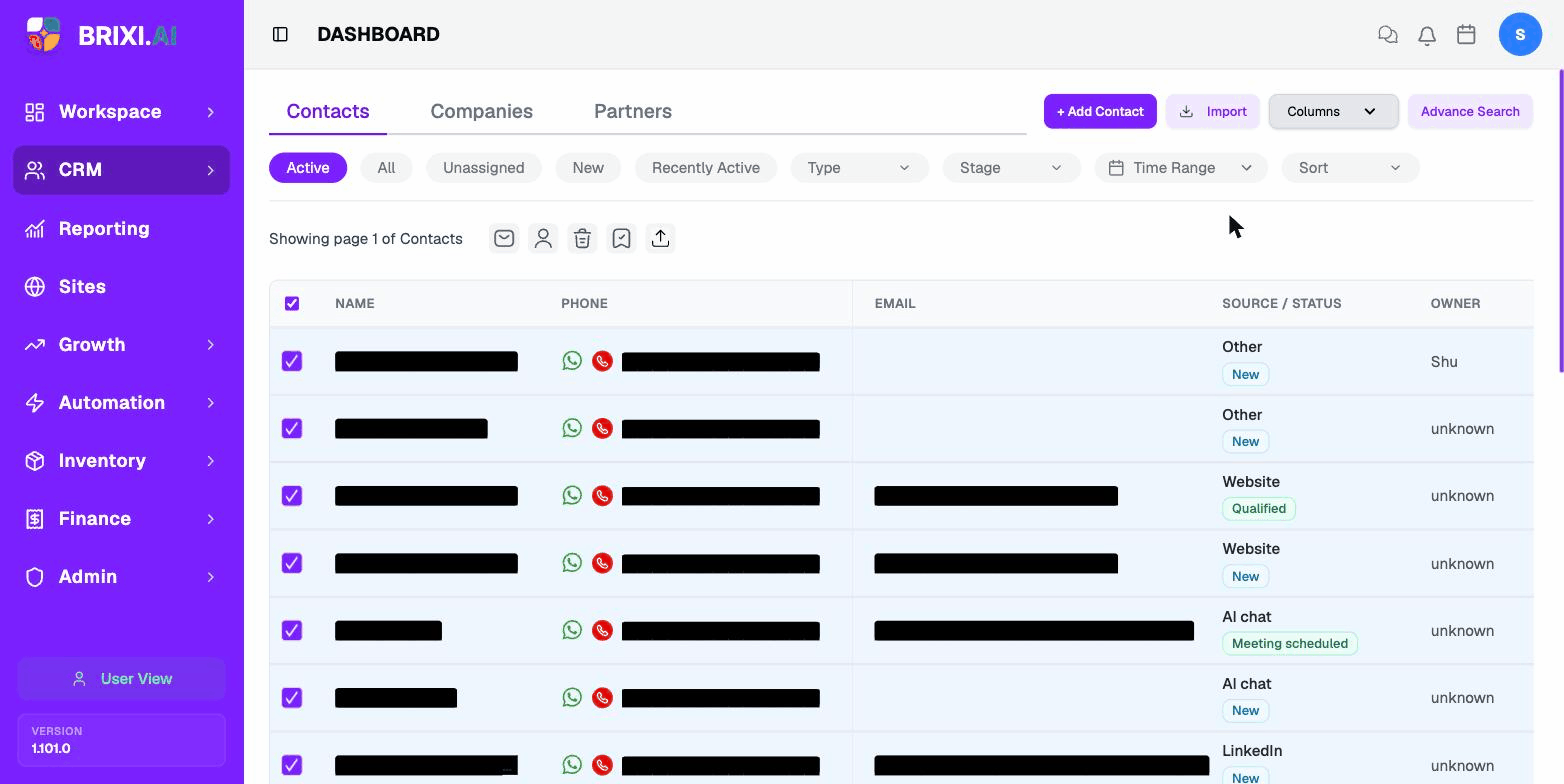
From left to right, the icons are:
- Send email (envelope)
- Assign / unassign owner (person)
- Delete (trash)
- Manage tags (tag / archive)
- Export (upward arrow)
The toolbar appears only after you've selected at least one contact. If you click an icon without selecting any rows, Brixi shows "No contacts selected".
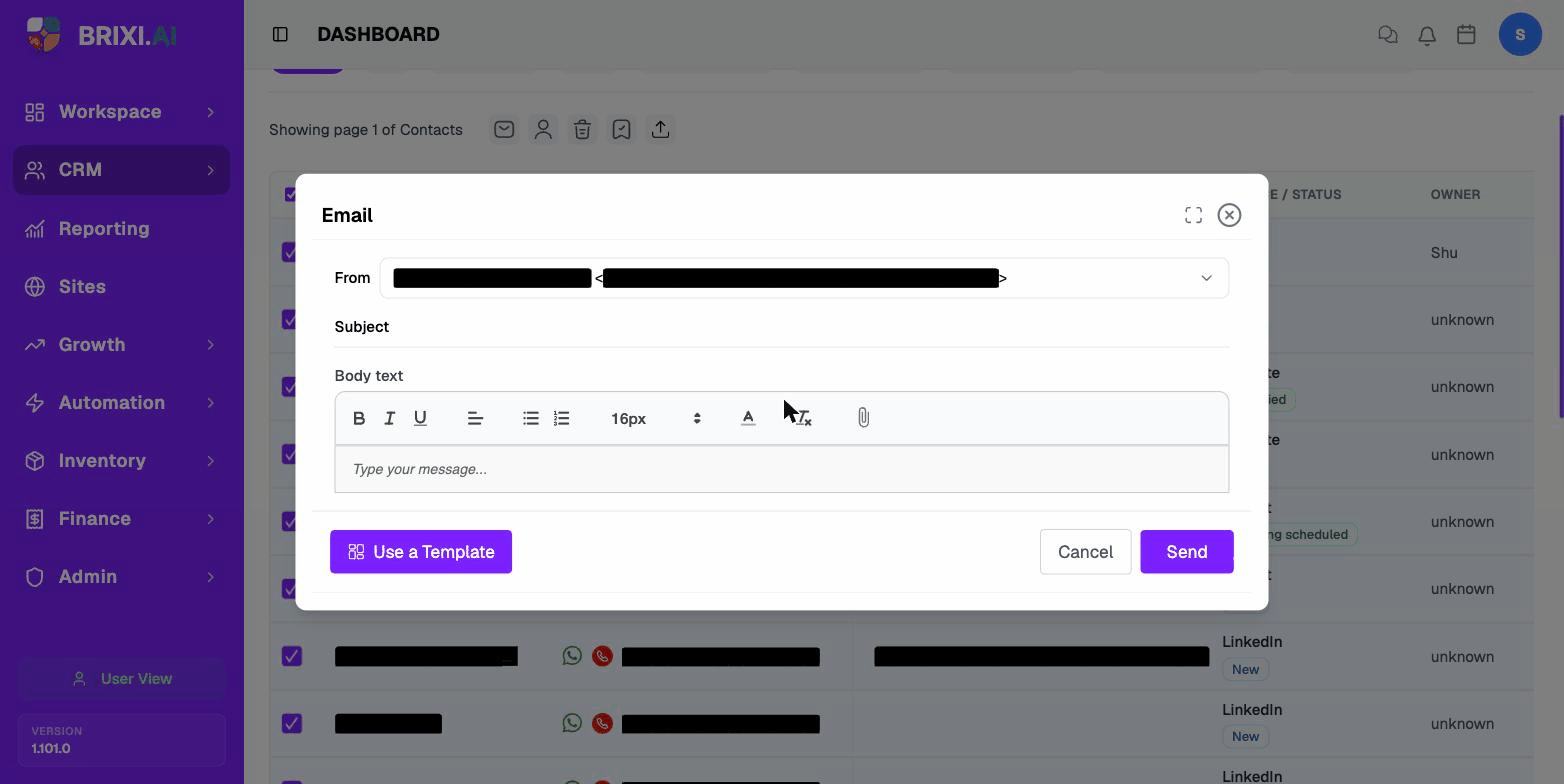
Send Email
Use this to send the same email to every contact you've selected — for example, a follow-up after an event or a status update to a segment.
- Select the contacts.
- Click the envelope icon in the toolbar. The Email composer opens.
- The From field is pre-filled with your connected email sender — change it if you have multiple senders connected.
- Enter a Subject.
- Type the Body text (or click Use a Template to start from a saved template).
- Click Send.
Brixi sends the email to each selected contact one by one and logs it on each contact's timeline.
You need at least one verified email sender connected. See Communication Integrations if no sender appears in From.
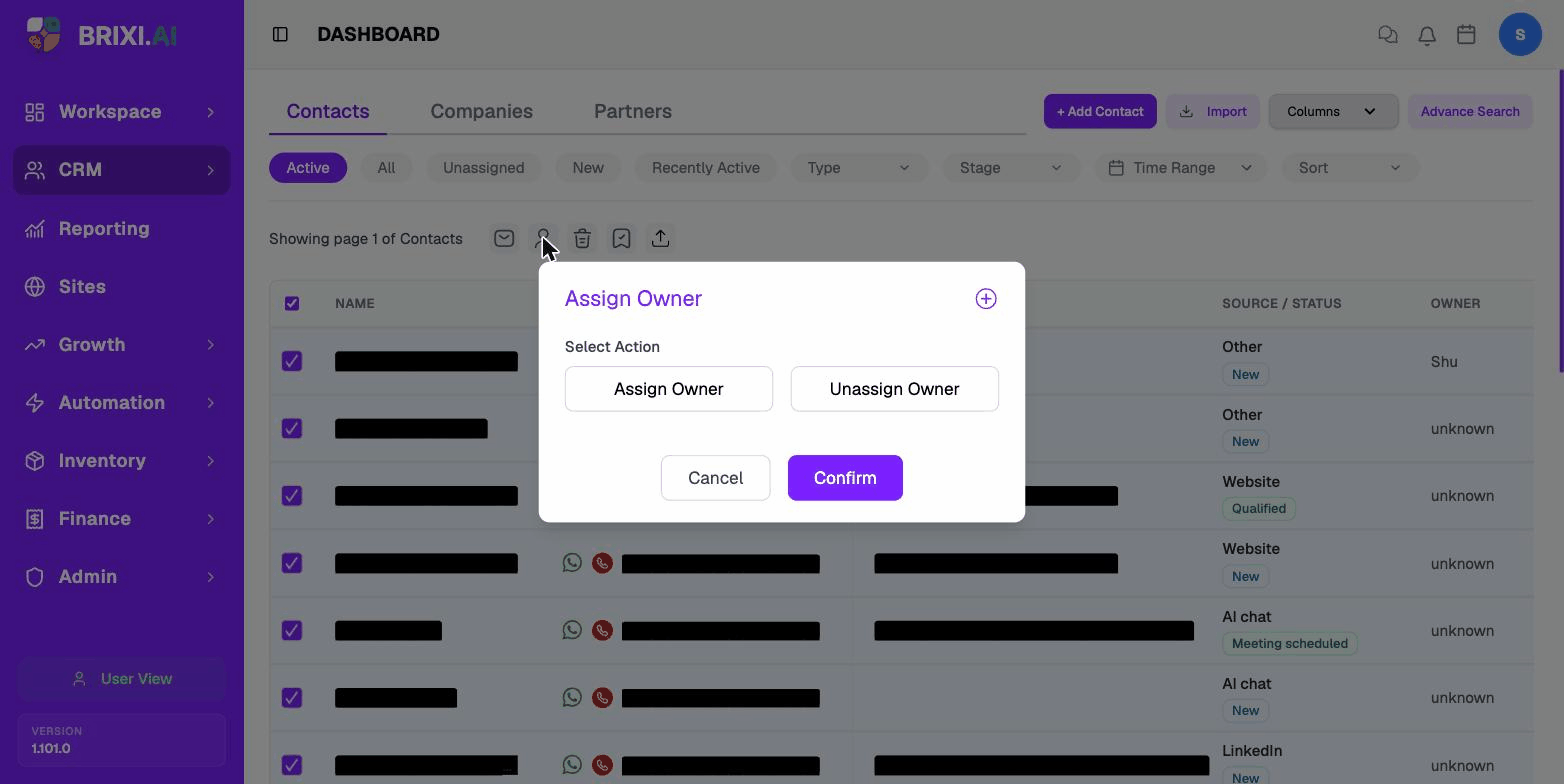
Assign or Unassign an Owner
Move a batch of contacts to a different owner — useful when reassigning a territory, onboarding a new user, or clearing an inactive user's list.
- Select the contacts.
- Click the person icon. The Assign Owner dialog opens.
- Choose the action:
- Assign Owner — pick a user to set as the new owner on every selected contact.
- Unassign Owner — clear the owner on every selected contact (they become unknown until reassigned).
- Click Confirm.
Delete (Remove) Contacts
Use bulk delete to remove contacts that should not be in your CRM — for example, test rows, duplicates, or rejected leads.
- Select the contacts.
- Click the trash icon. The Confirm Deletion dialog opens.
- Type a short Reason (required) explaining why these contacts are being removed. The reason is stored for audit.
- Click Confirm.

The dialog warns "This action cannot be undone." Double-check the selected rows before confirming, and prefer a tag (or a status like Disqualified) when you only want to mark contacts without losing the history.
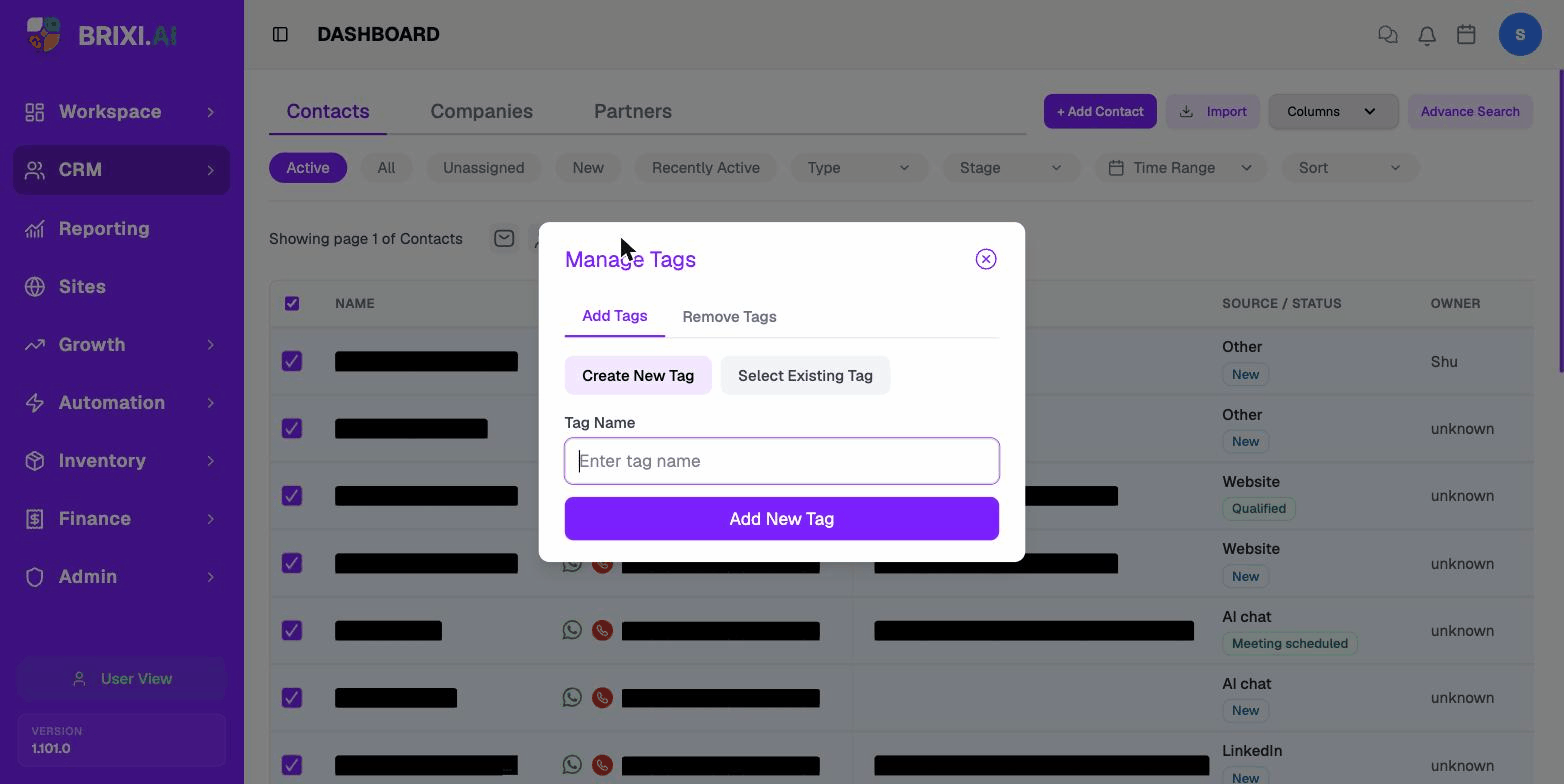
Add or Remove Tags in Bulk
Tags let you group contacts (for example, VIP, Cold lead, Q4 campaign). The bulk tag action lets you apply or remove a tag across every selected contact in one step.
- Select the contacts.
- Click the tag icon. The Manage Tags dialog opens with two tabs:
- Add Tags — apply a tag to every selected contact.
- Remove Tags — clear a tag from every selected contact.
- On Add Tags, choose:
- Create New Tag — type a new tag name and click Add New Tag to create it and apply it.
- Select Existing Tag — search and pick a tag your workspace already uses.
- On Remove Tags, search for the tag you want to clear and confirm.
To manage tags one contact at a time, see Add or Remove a Tag on a single contact.
Export Contacts
Export the selected contacts to a file you can download — useful for sharing with another team, importing into a different system, or keeping an offline backup.
- Select the contacts you want to export.
- Click the upward-arrow icon (the rightmost bulk action button).
- The export dialog opens. Choose the format:
- CSV (Comma Separated Values) — works with Excel, Google Sheets, and most tools.
- Excel (XLSX) — Excel-native workbook.
- Click Continue with Import to start the export.
When the export is ready, Brixi shows "export prepared successfully!".
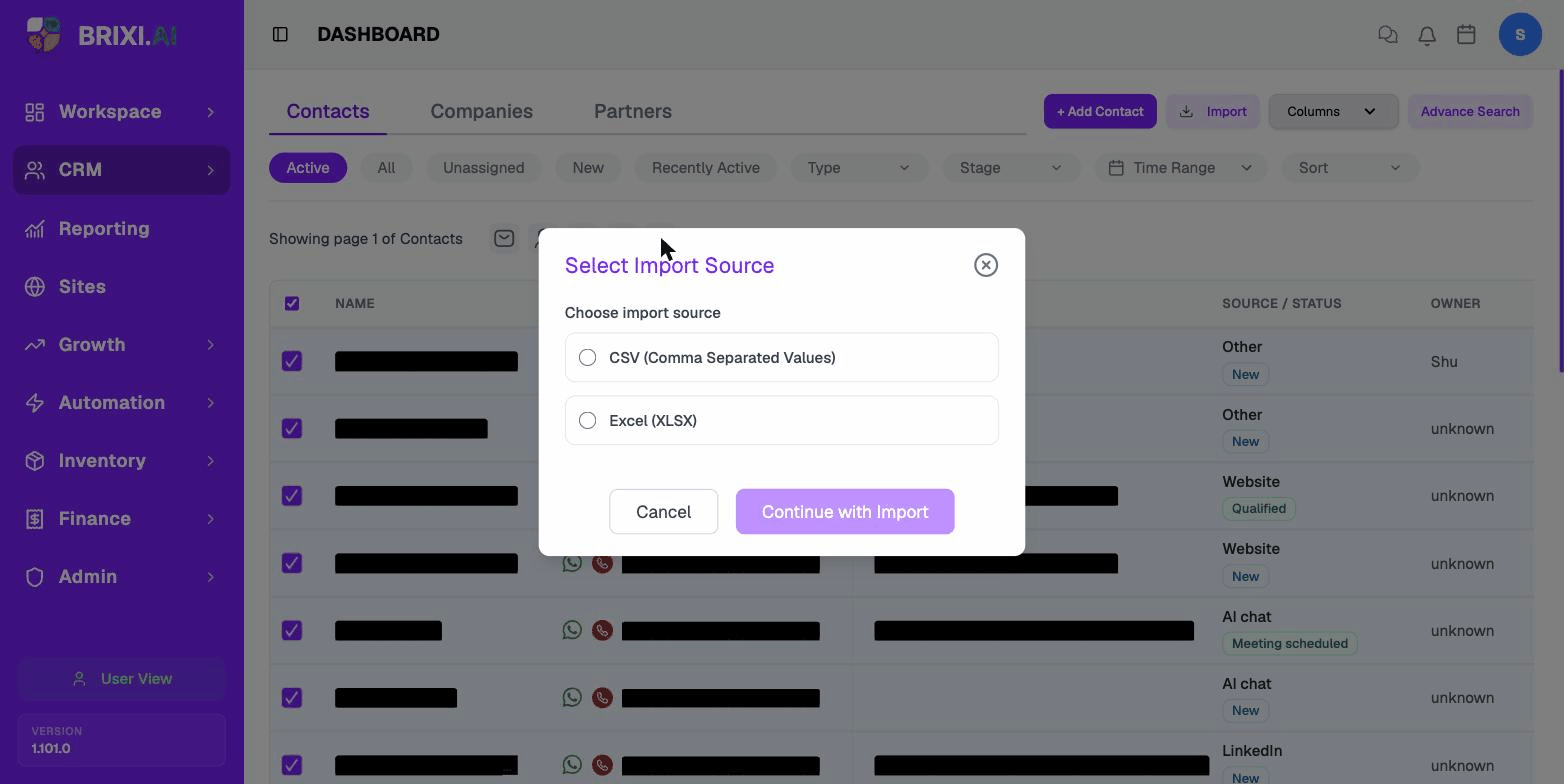
The dialog is currently labelled Select Import Source and the button reads Continue with Import, but the action is an export — it downloads a file of the contacts you selected. The wording will be cleaned up in a future release.
Troubleshooting
Each bulk action has its own permission, so it's normal for some icons to be missing from your toolbar — your admin can tell you which ones your role includes. Bulk delete in particular is often restricted; ask before assuming it's broken. And if From is empty in the email composer, your workspace needs a verified sender connected, which is also an admin job.
Contact Brixi support if a bulk action confirms but only applies to some of the selected contacts, or an export says "prepared successfully" and never downloads. Include roughly how many contacts you'd selected and which action you ran.