Create a Chat Agent
Create an AI agent that handles customer conversations in the Omnichannel Inbox — replying in the customer's language, following your script, and pulling answers from a shared knowledge base. Build one chat agent per clearly defined use case so reports and troubleshooting stay easy to read; each one bundles its own purpose, prompt, knowledge base, tools, supported languages, and behavior settings.
Entry pointAutomation → AI Assistants → Agents
| Article summary | Details |
|---|---|
| Requires | Permission to create or edit agents on the Automation → AI Assistants workspace. |
| Where to go | Automation → AI Assistants → + Create an Agent → Chat. |
Create a Chat Agent
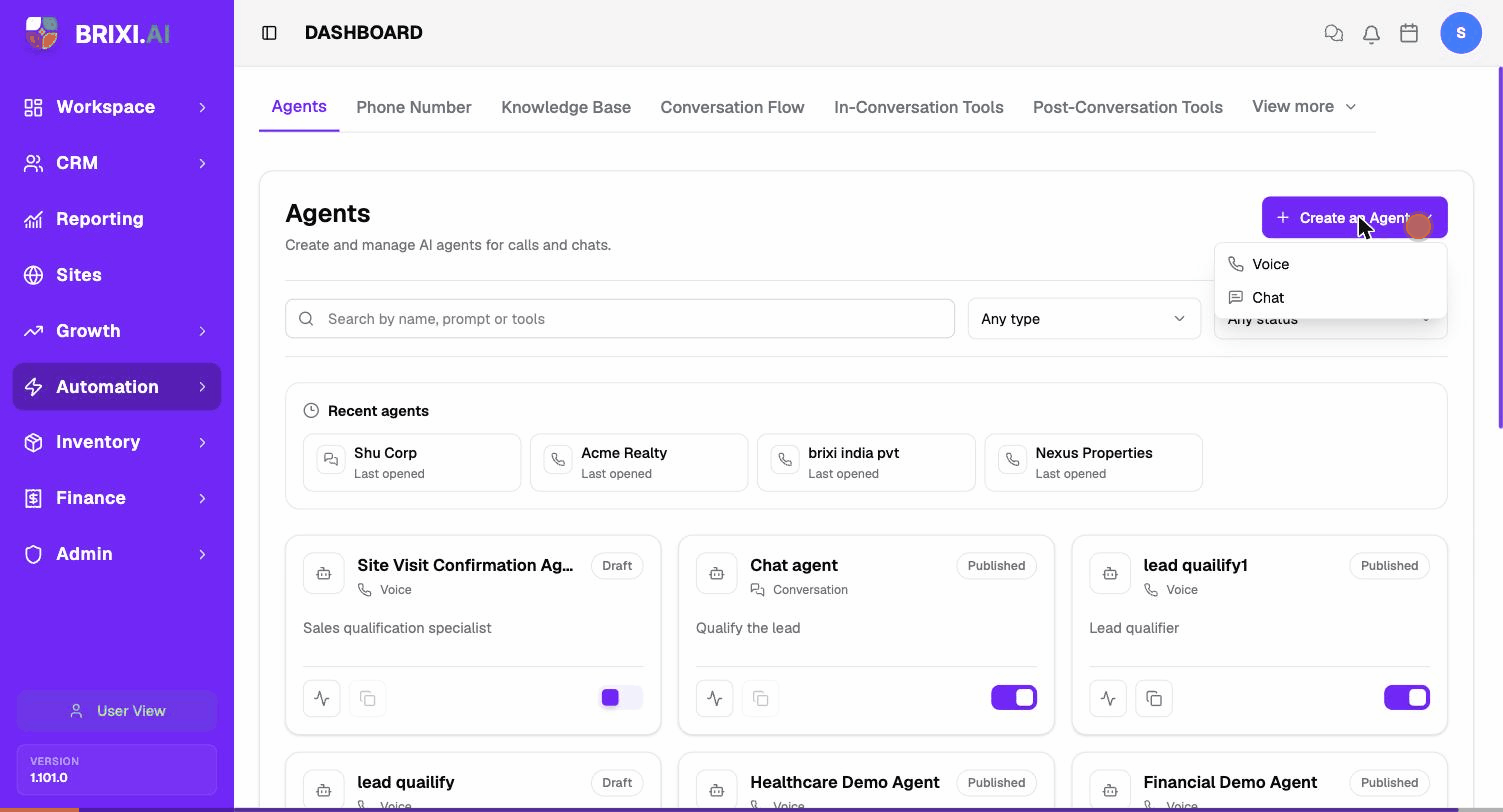
- Open Automation → AI Assistants. The Agents tab opens by default.
- In the top-right, select + Create an Agent. A small menu appears.
- Choose Chat (for inbox messages). Voice is documented separately under the Voice Agent Guide.
- In the Create a Chat Agent dialog, pick one:
- Start from scratch — open a blank agent and configure every field yourself.
- Use a Chat Template — start from a pre-built agent for a common industry or use case and edit from there.
- For Start from scratch, the Create a Blank Agent form opens.
Fill:
- Name — describe the job, not the team. Lead Qualification Chat, not WhatsApp Bot.
- Business Name — the brand the agent represents to customers. Defaults to your workspace name.
- Role — a short description of what the agent does, for example Sales qualification specialist.
- Initial Message — the first line the agent sends when a conversation opens, for example Hi! Thanks for reaching out — can I help you find the right home?
- Type — keep Conversation selected (Voice is the phone-call variant).
- Select Create Agent. The agent saves as a Draft and the agent editor opens.
The form will not save until each field is filled.
Agent Editor Overview
After creating the agent you land on its editor at
Automation → AI Assistants → [agent name] (URL …/assistant/cat_…).
The page has three areas:
- Header (top) — agent name, Conversation badge, Draft /
Published status, agent ID (next to the small copy icon, prefixed
cat_…), and the Save / Test / 🚀 Deploy action buttons. - Tabs — Build (default), Monitor, Analysis. Most setup work happens under Build.
- Build sidebar (left) — Agent Details, Agent Setting,
Prompt. These three sections cover everything you can configure
on a chat agent. The Prompt view pairs a rich-text editor with an
All Variables panel (System Variables such as
agent_name,callee_name, andbusiness_name, plus Pre-Call Variables and Action Results) — see Write the Chat Agent Prompt. - Right rail (Agent Details view only) — Knowledge Bases, Chat Tools, Post-Chat Analysis cards with a + button on each.
The agent ID under the name (for example, cat_019e1cd…)
is what you reference from logs, the API, and the Inbox owner picker.
Use the copy icon next to it.
Unlike voice agents, chat agents have no Phone Number tab and no Voice (TTS) or Speech-to-Text (STT) pickers — text channels don't need them. Chat agents do keep the LLM Model picker (a language model still generates every reply); it sits at the bottom of Agent Details. The header exposes Save, Test, and Deploy.
Update Agent Details
The Build → Agent Details view holds every field you set during creation, plus the LLM Model picker. Edit any field and select Save in the top-right.
| Field | What it does |
|---|---|
| Agent Name | The internal name. Visible in the agents list, inbox picker, and reports. |
| Business Name | The brand the agent speaks on behalf of. Used in the prompt's business_name variable. |
| Agent role | Short description shown on the agent card and in the inbox picker. |
| Initial Message | The exact opening line the agent sends when a new conversation starts. |
| AI Model (LLM) | The language model that generates every reply. Set under LLM Model → AI Model at the bottom of this view. |
Always update the existing agent when its job changes — don't clone it for minor edits. Reports stay continuous when the agent ID does.
Choose the AI Model (LLM)
The LLM Model section at the bottom of Agent Details ("Choose the model to be used for response generation") sets which language model writes the agent's replies.
- Scroll to LLM Model.
- Open the AI Model dropdown and type a few characters to filter the list.
- Pick a model, then select Save in the top-right.
If the dropdown shows No models available — Add an active model for this category before selecting one, your workspace has no enabled LLM provider yet. An admin must enable a provider before chat agents can pick a model.
Tune Agent Setting
The Build → Agent Setting view groups every behaviour setting that isn't about model picks. Use it after the agent replies correctly but you need to control how it behaves.
| Setting | What it controls | Range / Default |
|---|---|---|
| Wait for first message | Autopilot Mode — delay how long the agent waits before sending its first message. Set to 0 to reply immediately when assigned. | 0–300 seconds, default 0 |
| Maximum number of messages a conversation | Hard cap on how many messages this agent will exchange in one conversation before stopping. | 1–10000, default 32 |
| Memory window size | How many recent messages the LLM sees as context. Larger windows give the agent more memory but use more tokens. | 0–64, default 64 |
| AI working hours | If on, the agent stops automated replies outside the configured working window. | Off by default |
| Languages | Multi-select list of languages the agent can reply in. The agent will detect the customer's language and reply in the closest match. | All major Indian + global languages |
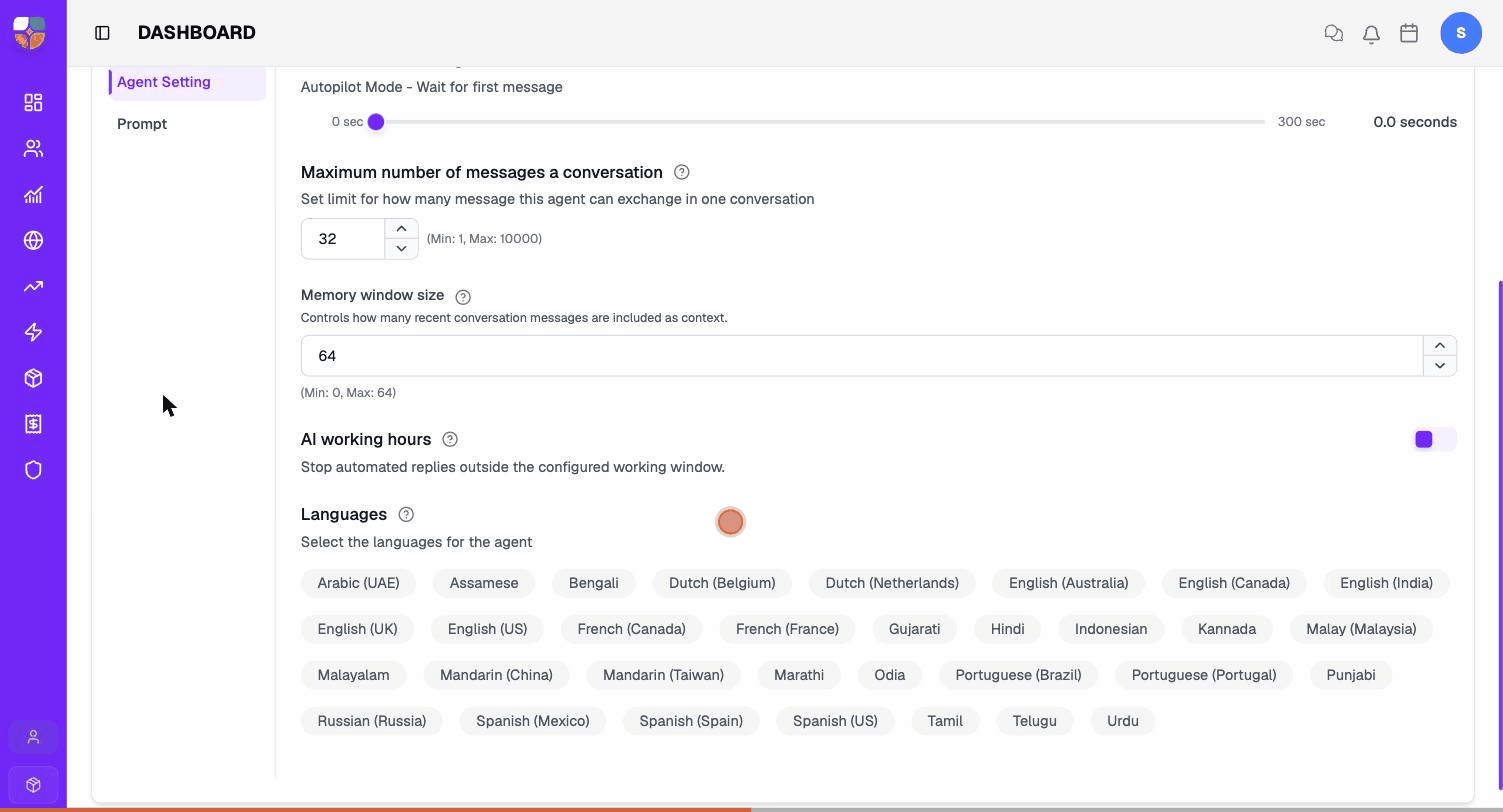
Set Maximum number of messages a conversation conservatively for chat agents that can't escalate. An infinite-loop prompt with no message cap can fire hundreds of replies before someone notices.
Languages — what to pick
Tick every language a real customer might write in. Common selections:
- India multilingual — English (India), Hindi, Marathi, Gujarati, Tamil, Telugu, Kannada, Malayalam, Bengali, Punjabi, Odia, Assamese, Urdu.
- Global — English (US/UK), Spanish, Arabic (UAE), Portuguese.
If a customer writes in a language not on the list, the agent will default to the first language selected.
Attach Knowledge, Tools, and Analysis
The right rail on Build → Agent Details exposes three attachments that share the same workspace-level pool with voice agents.
| Card | What it adds | Read more |
|---|---|---|
| Knowledge Bases | Trusted source material the agent can cite during a conversation. | Knowledge Base for Chat Agents |
| Chat Tools | Actions the agent can take mid-conversation (User Handoff, Route To, API HTTP, Appointment Scheduler, End Conversation). | Chat Tools |
| Post-Chat Analysis | Structured outputs extracted after the conversation ends (outcomes, summaries, fields). | Post-Chat Analysis |
Each card has a + button — select it to attach an existing item or create one inline. The card then lists what's attached and lets you remove items.
Treat tools like permissions — give the agent only the actions its use case truly needs. A qualification chat agent rarely needs API Tool (HTTP) and Appointment Scheduler at the same time.
Save, Test, Publish
The top-right of the editor has three buttons (chat agents don't have a Call button):
| Button | What it does |
|---|---|
| Save | Save the current draft. Nothing goes live yet. |
| Test | Open a test chat session against the current draft so you can talk to it before exposing it to live customers. See Test a Chat Agent Before Launch. |
| Deploy | Publish the agent so it's visible to the inbox owner picker and workflows. |
After the test session is clean, publish the draft from the editor header. Publish only after the draft passes test conversations — review the transcript, the handoff path, and at least one stop path before going live.
Agent Statuses
| Status | What it means | Recommended action |
|---|---|---|
| Draft | Being configured. Won't appear in the inbox picker. | Finish the prompt, knowledge, tools, and at least one test session. |
| Published | Live and able to handle conversations. | Watch reports for the first day; keep the prompt and KB current. |
| Paused / Off | Toggled off on the card. Won't accept new conversations even though it's Published. | Use when content, routing, or tool behaviour needs review. |
| Archived | No longer part of active operations. | Keep historical reports; remove operational references first. |
See the full publish / toggle flow on AI Chat Agents → Publish & Toggle.
Troubleshooting
Two blockers on this page need an admin: a missing + Create an Agent button (your role can't create agents) and an empty AI Model dropdown showing "No models available" (no LLM provider is enabled for the workspace). Neither is something you can fix from the agent editor.
Contact Brixi support if a deployed agent ignores its saved settings — for example, it replies outside the configured AI working hours, blows past the message cap, or answers in a language that isn't selected. Include the agent ID (the cat_… value under its name) and a conversation that shows the behavior.